
Due to its mature diagnostic technology, reliability, easy operation, moderate price, and no harm to patients, the electrocardiogram machine has become one of the most common diagnostic tools in bed. As the scope of application continues to expand, it has become one of the five routine examinations of “blood, urine, stool, imaging, and electrocardiogram”, especially for certain cardiovascular diseases such as: chronic ischemic heart disease, acute coronary syndrome , Myocarditis, pericarditis, pulmonary embolism and arrhythmia have diagnostic value. Do you know how to use it.

To use an ECG (Electrocardiogram) machine, follow these general steps:
1. Prepare the patient: Ensure the patient is in a comfortable position and has exposed their chest area. They may need to remove clothing or jewelry that could interfere with electrode placement.
2. Power on the machine: Turn on the ECG machine and allow it to complete its startup process. Make sure the machine is functioning properly and that the necessary supplies, such as ECG electrodes and conductive gel, are available.
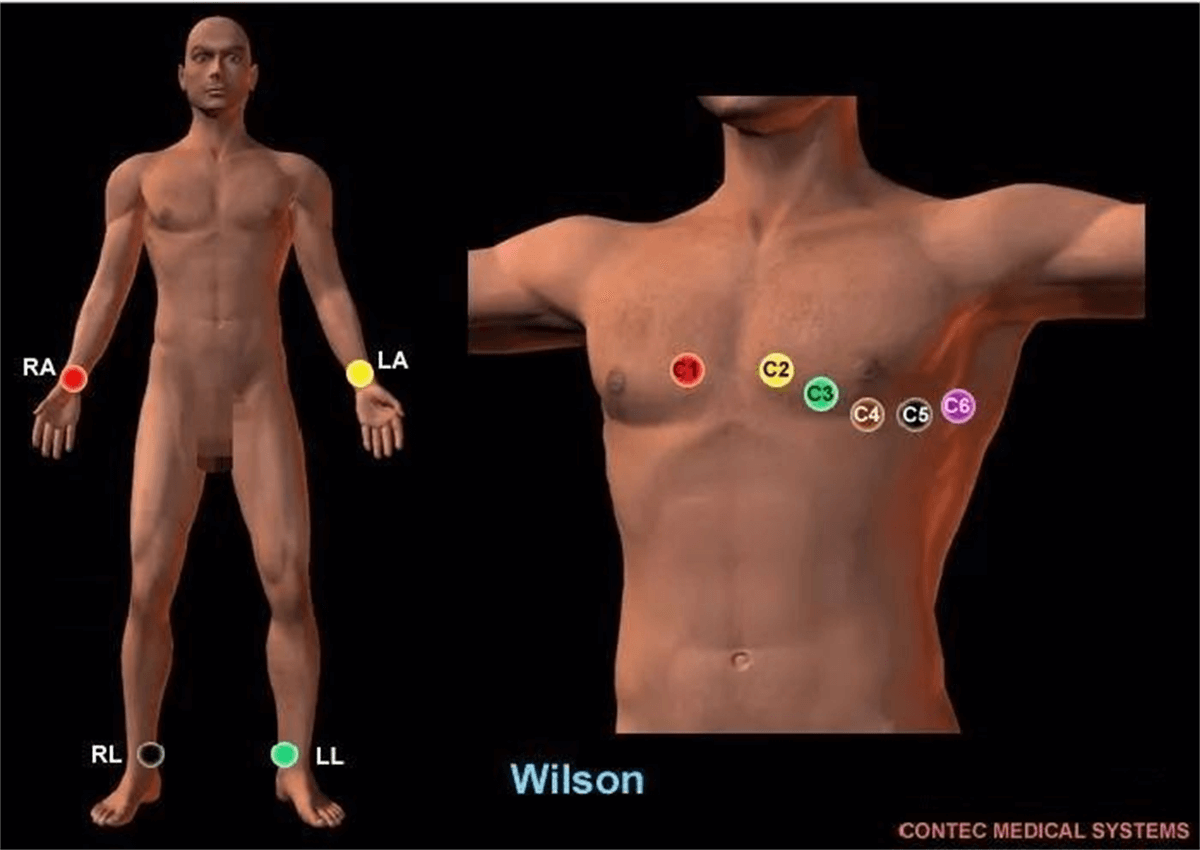
3.Attach the electrodes: Place the ECG electrodes on specific locations of the patient’s body as instructed by the machine’s manufacturer or healthcare professional. Typically, electrodes are placed on the chest, arms, and legs. Follow the color-coding on the electrodes to ensure correct placement. Here are some typical ECG leads : chest leads, limb leads, and standard leads.
1)Limb lead connection method:Right upper limb – red line, left upper limb – yellow line, left lower limb – green line, right lower limb – black line
2)Chest lead connection method:
V1, the 4th intercostal space at the right border of the sternum.
V2, the fourth intercostal space on the left border of the sternum.
The midpoint of the line connecting V3, V2 and V4.
V4, the intersection of the left midclavicular line and the fifth intercostal space.
V5, the left anterior axillary line is at the same level as V4.
V6, the left midaxillary line is at the same level as V4.
V7, the left posterior axillary line is at the same level as V4.
V8, the left scapular line is at the same level as V4.
V9, the left paraspinal line is at the same level as V4.
(V1-V6 wiring in order of color: red, yellow, green, brown, black, purple)
4. Prepare the skin: If necessary, clean the patient’s skin with an alcohol pad or similar cleaning solution to remove oils, dirt, or sweat. This helps improve the quality of the ECG signal.
5. Apply conductive gel (if required): Some electrodes may require the application of conductive gel to improve electrical contact with the skin. Follow the instructions provided with the electrodes or consult the machine’s user manual for proper gel application.
6. Connect the electrodes to the machine: Attach the electrode leads to the corresponding ports on the ECG machine. Ensure a secure connection to avoid artifacts or interference during recording.
7. Start the recording: Once the electrodes are properly attached, initiate the recording function on the ECG machine. Follow the prompts or instructions provided by the machine’s interface.
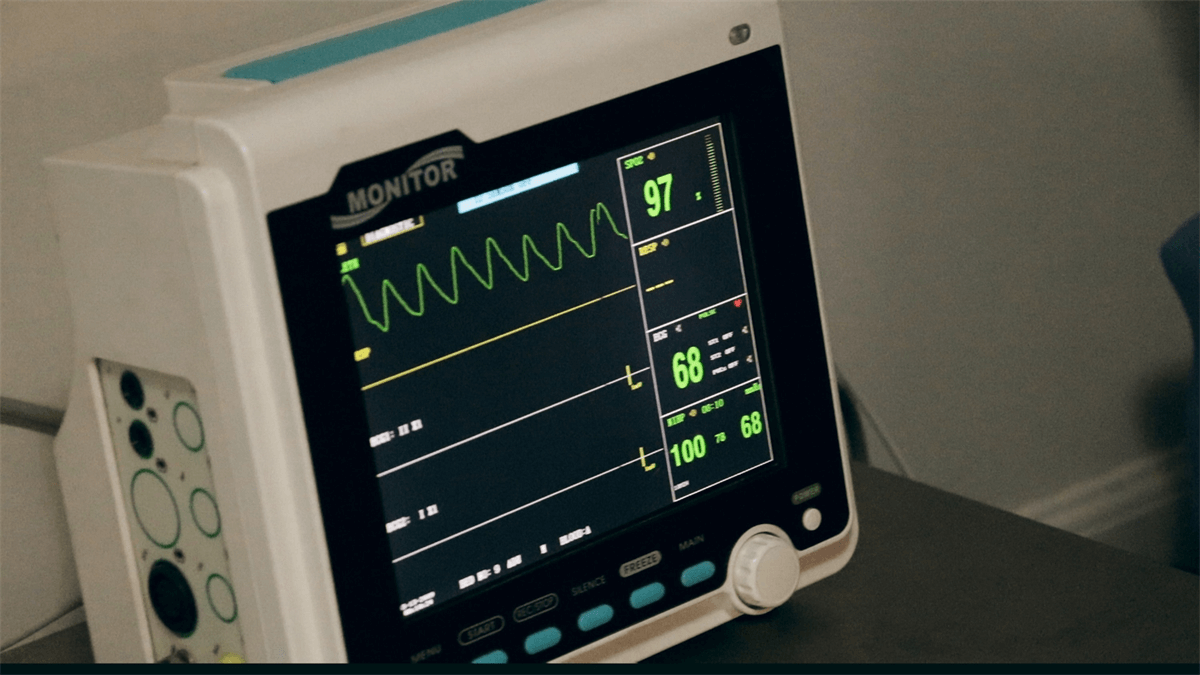
8. Monitor the recording: Keep an eye on the ECG waveform displayed on the machine’s screen. Ensure that the signal quality is good, with clear and distinct waveforms. If necessary, adjust the electrode placement or check for loose connections.
9. End the recording: Once the desired recording duration has been achieved or as instructed by a healthcare professional, stop the recording function on the machine.
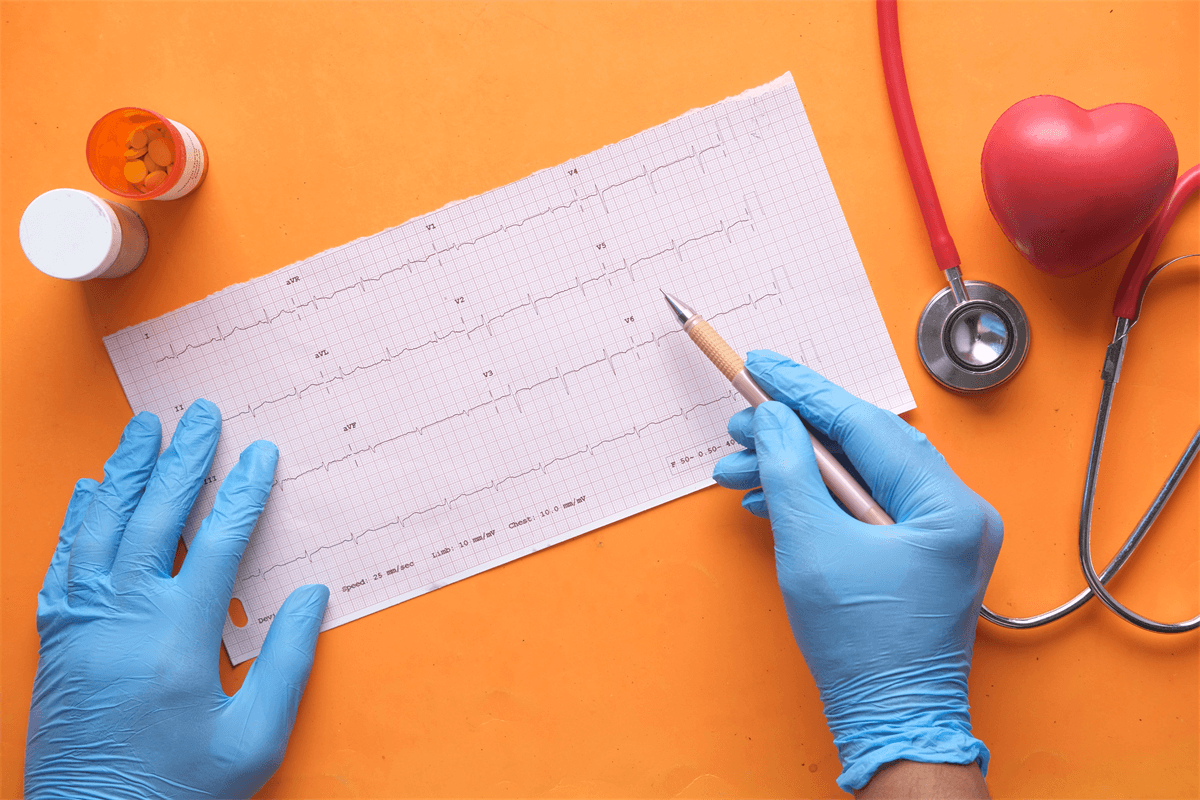
10. Review and interpret the ECG: The recorded ECG will be displayed as a graph or waveform on the machine’s screen. It’s important to note that interpreting the ECG requires medical expertise. Consult a trained healthcare professional, such as a doctor or cardiologist, to analyze the ECG and interpret the results accurately.
Post time: Jun-03-2023


